SV Phoenix - Rainman Retrofit
The Brineomatic project was started in order to automate my Rainman watermaker on my own personal boat Phoenix. The goals were to have minimal modifications to the original equipment, and to allow for graceful failure where the watermaker can be switched to manual mode very easily. All of the critical digital sensors (flowrate, pressure, salinity) have an analog backup, and all of the critical actuated outputs (high pressure valve, diverter valve) can be bypassed to manual mode by removing a few easy to access screws.
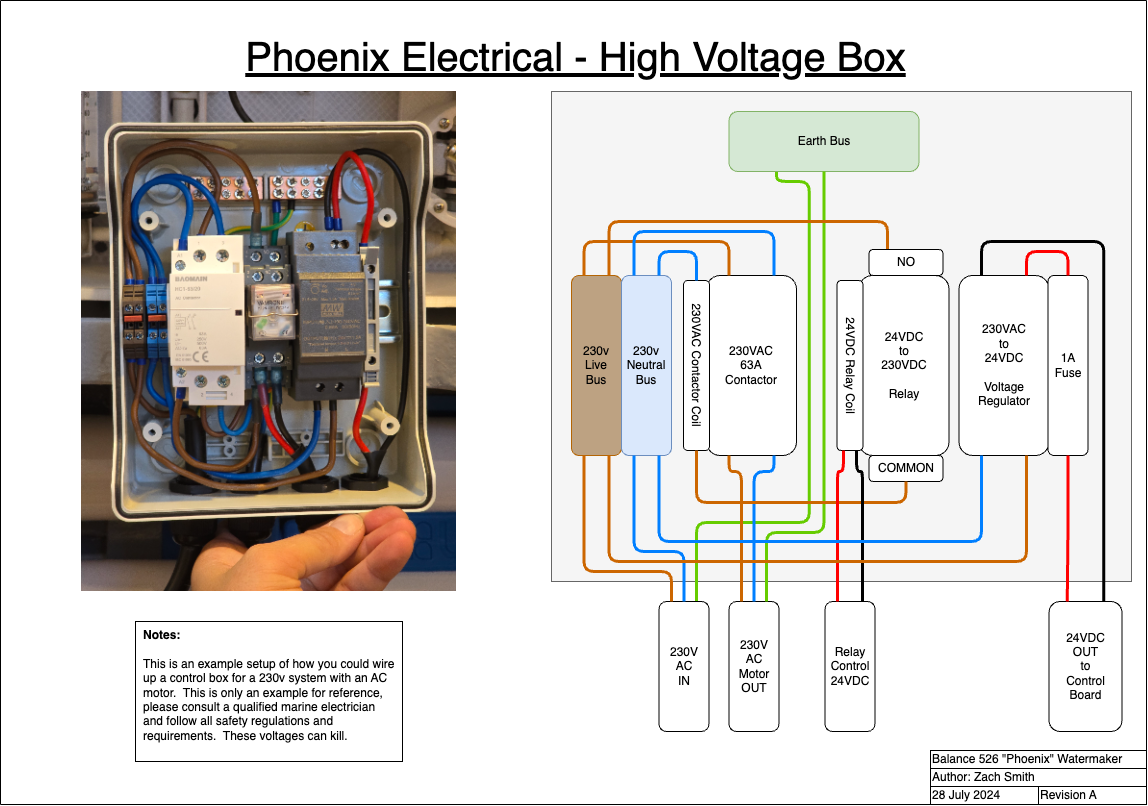
Electrical - High Voltage
My watermaker runs on 230v, and all the high voltage electronics are all installed into a waterproof DIN rail enclosure. This allows for an easy installation, keeps humans safe from the high voltage, as well as keeping everything dry.
For controlling the AC motor, I use a 230v / 25a (7b) contactor. It is important to get a contactor with a 7b rating suitable for your motor in order to handle the inductive load. This Baomain contactor from Amazon has handled hundreds of cycles so far with zero issues.
The coil for this contactor needs AC voltage, so I have a small relay that switches the contactor on and off. The relay is the part that is controlled by Brineomatic. This has worked great for hundreds of cycles.
Brineomatic itself is powered by a DIN mounted Meanwell 24v PSU. This provides a clean power supply to Brineomatic, as well as allowing me to have a single breaker to control power to the entire system.
I did not have room in my installation to put Brineomatic into the box, but it is a bit neater and safer with the board isolated from potential saltwater contact.
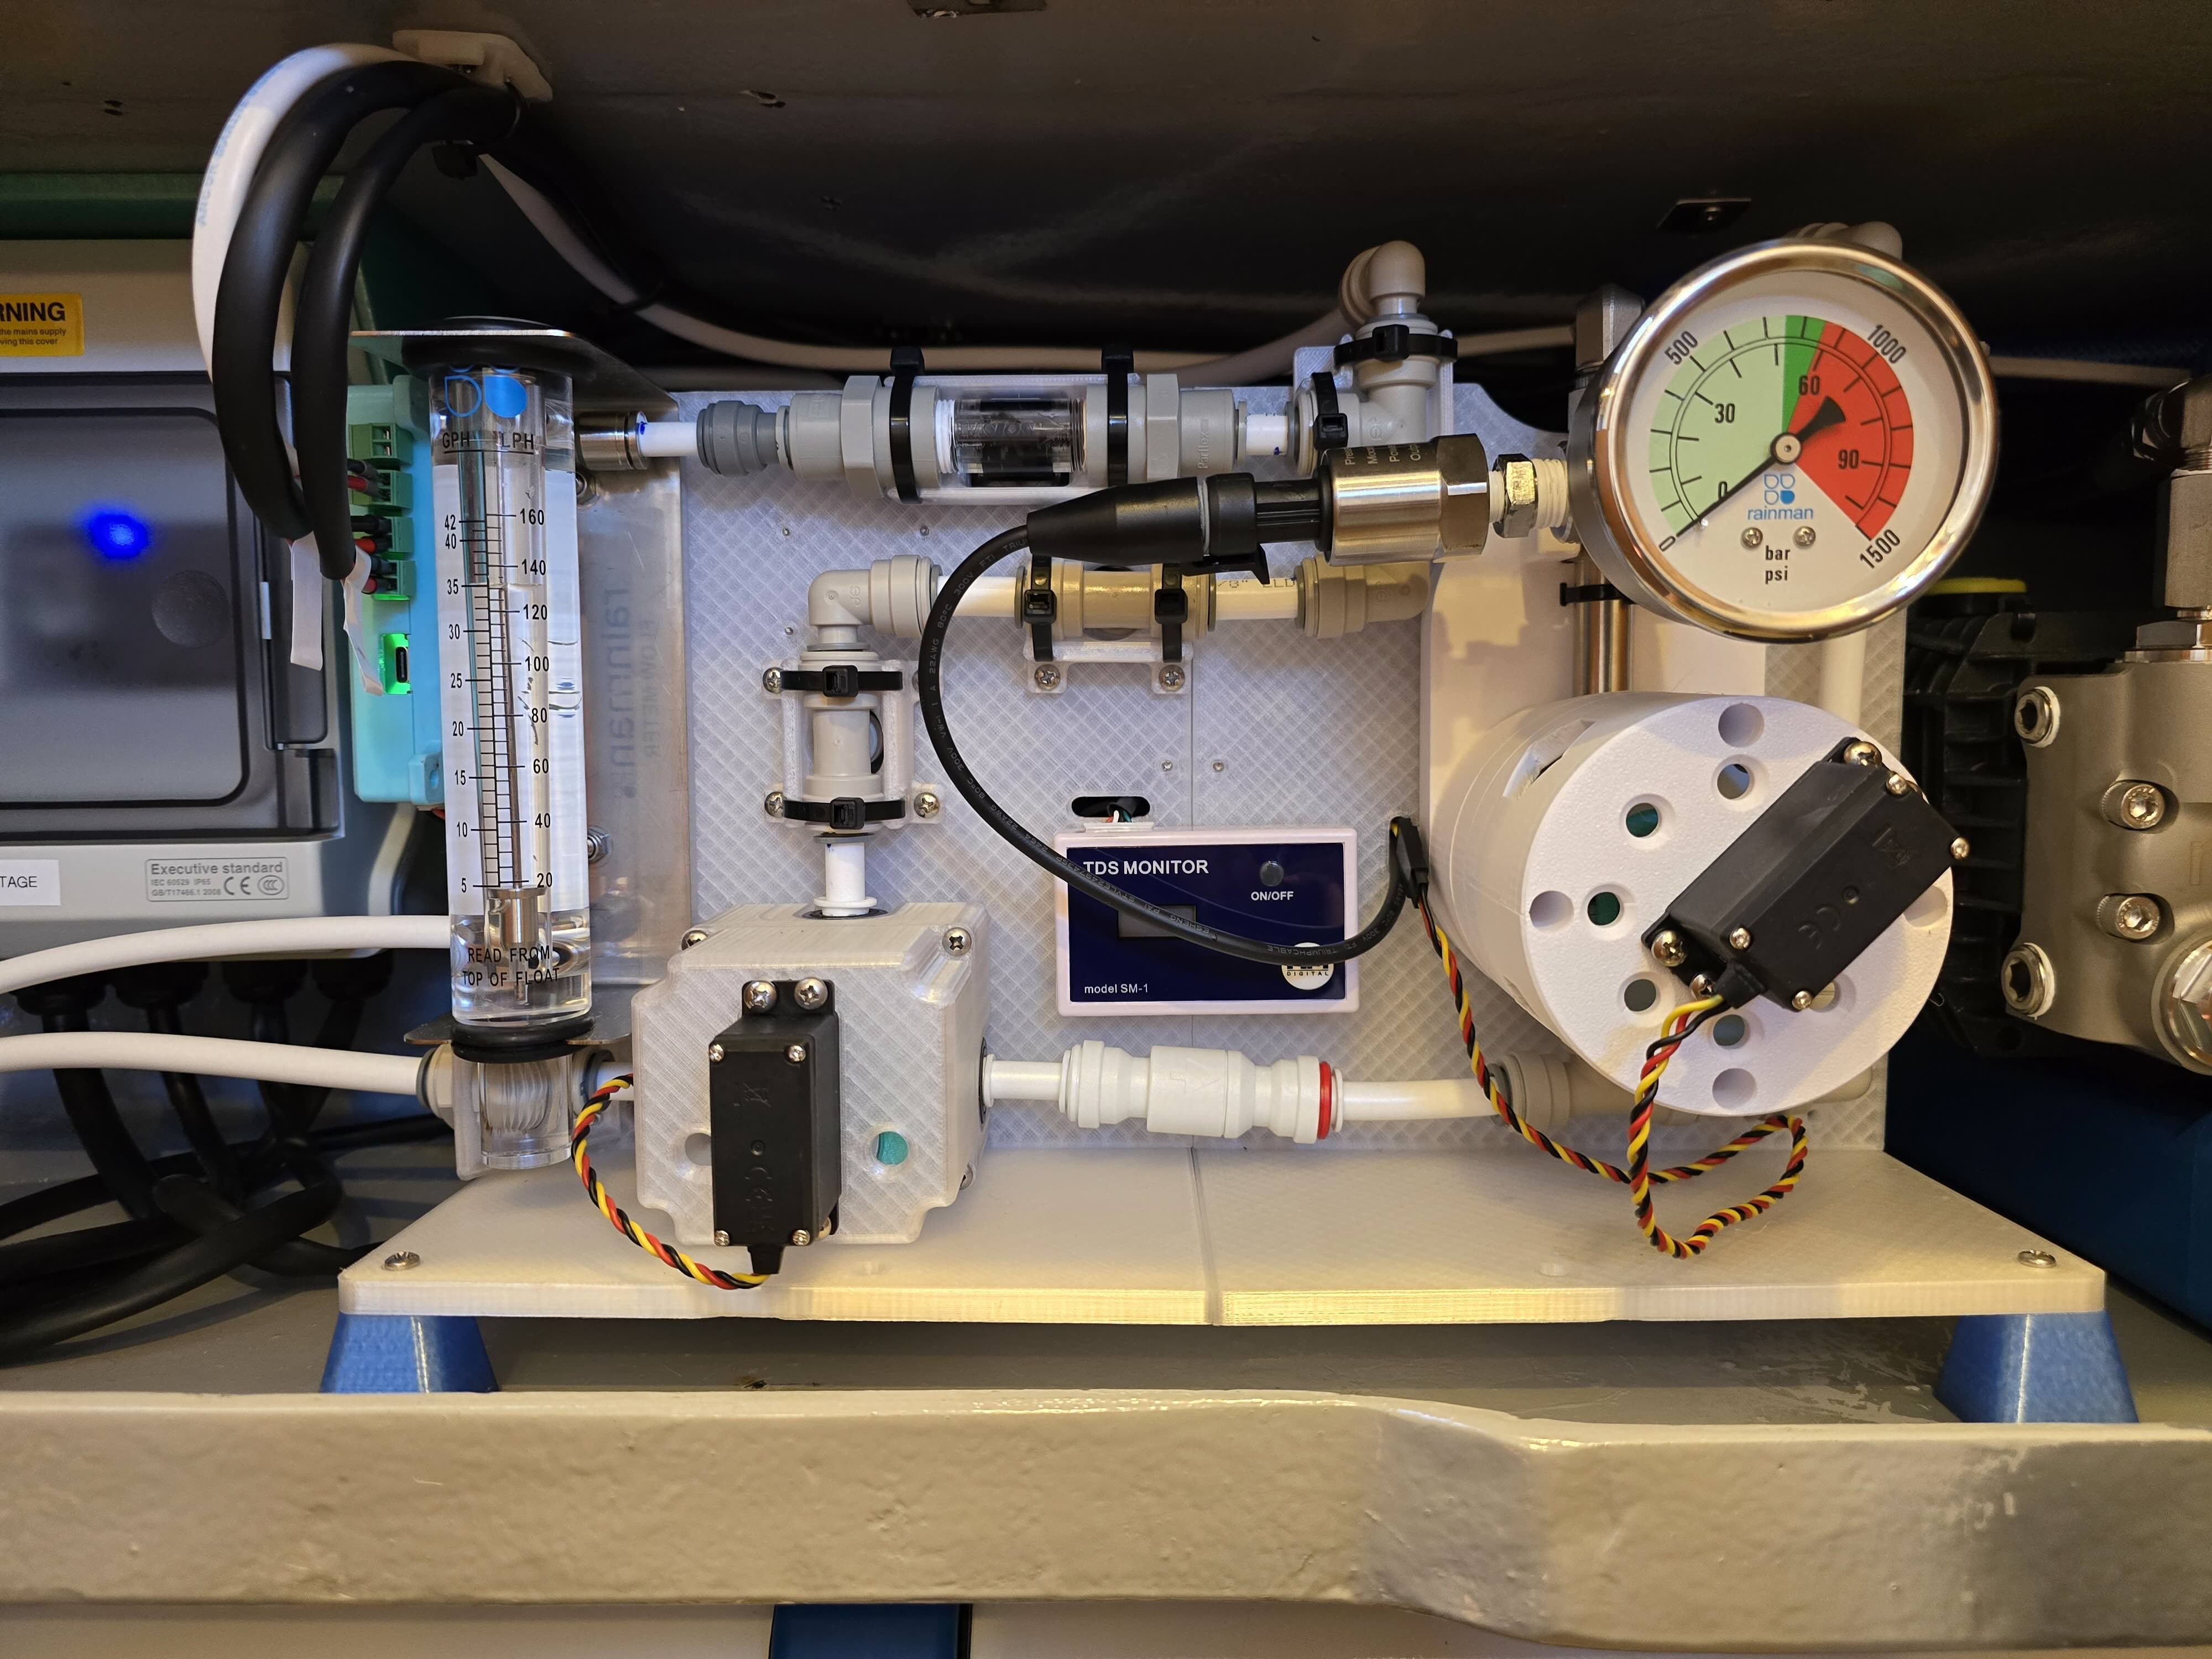
Control Panel
The control panel is where most of the sensors and actuators live. It has a bunch of 3d printed parts to hold everything together. This is where the motors to control the diverter valve, and the high pressure valve are located, as well as the flowmeters, tds sensors, and the high pressure sensors are located.
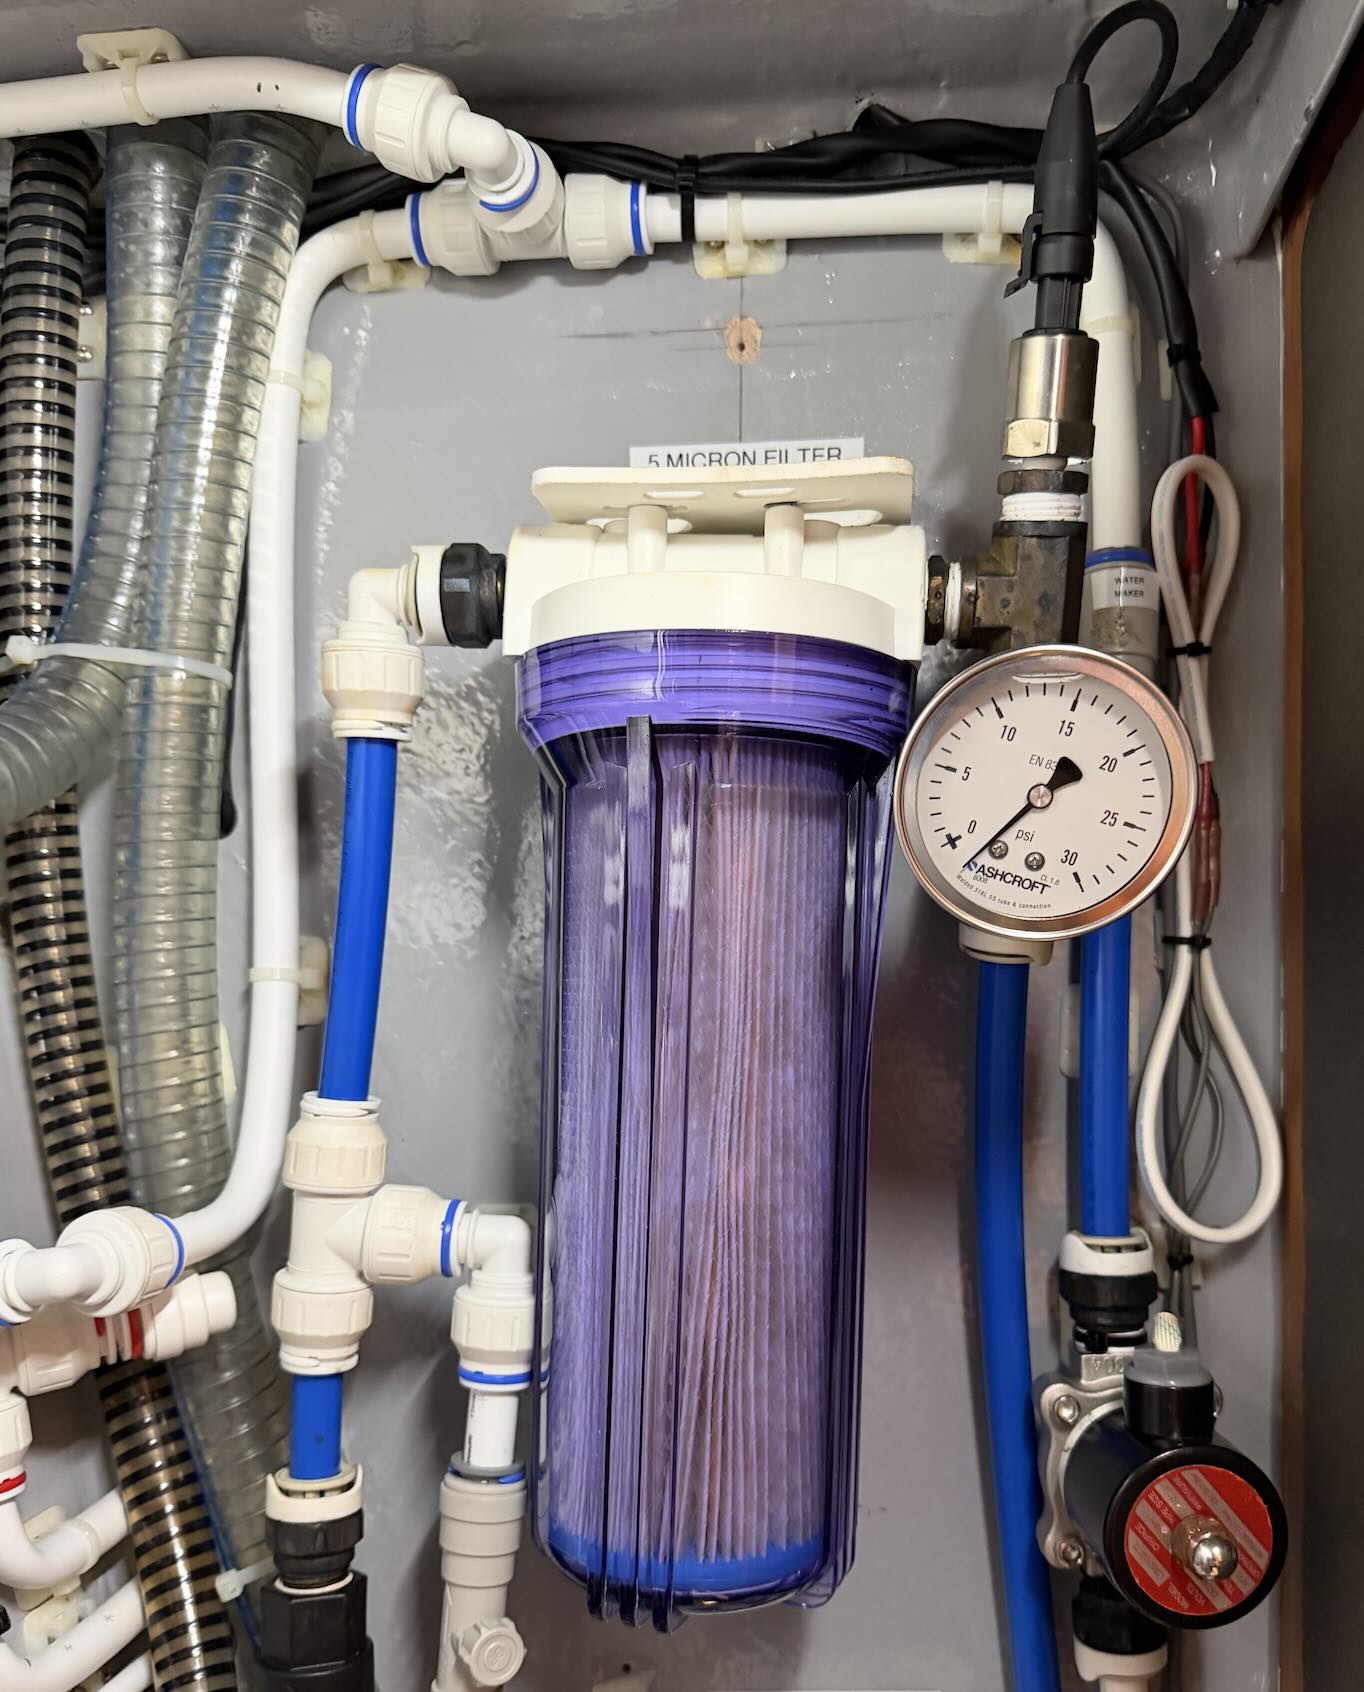
Low Pressure Side
Here is the filter installation with the low pressure gauge and sensor, as well as the solenoid flush valve in the bottom right. The solenoid is wired directly to Brineomatic as it is fairly low amperage.
Diverter Valve
The diverter valve assembly controls the flow of the product water - either overboard or to the tanks. This is important because the inital product water is typically too salty, and it is possible for the membrane to fail. With a diverter valve, the system can make sure you only get clean water into your tanks.
The design itself is pretty straightforward: a couple parts to attach the servo motor and the valve, as well as a 3d printed adaptor between the servo motor and the valve itself. There are two holes on the motor mount, that allow you to see the valve position.
For the valve itself, it is very important to choose a valve that never fully closes off the water flow. If you close off the product flow, pressure will build with nowhere to go, and things will break. The valve I have used in this design allows the water to flow at all times. It also has screw holes for panel mount, and the handle can be removed with a single screw.
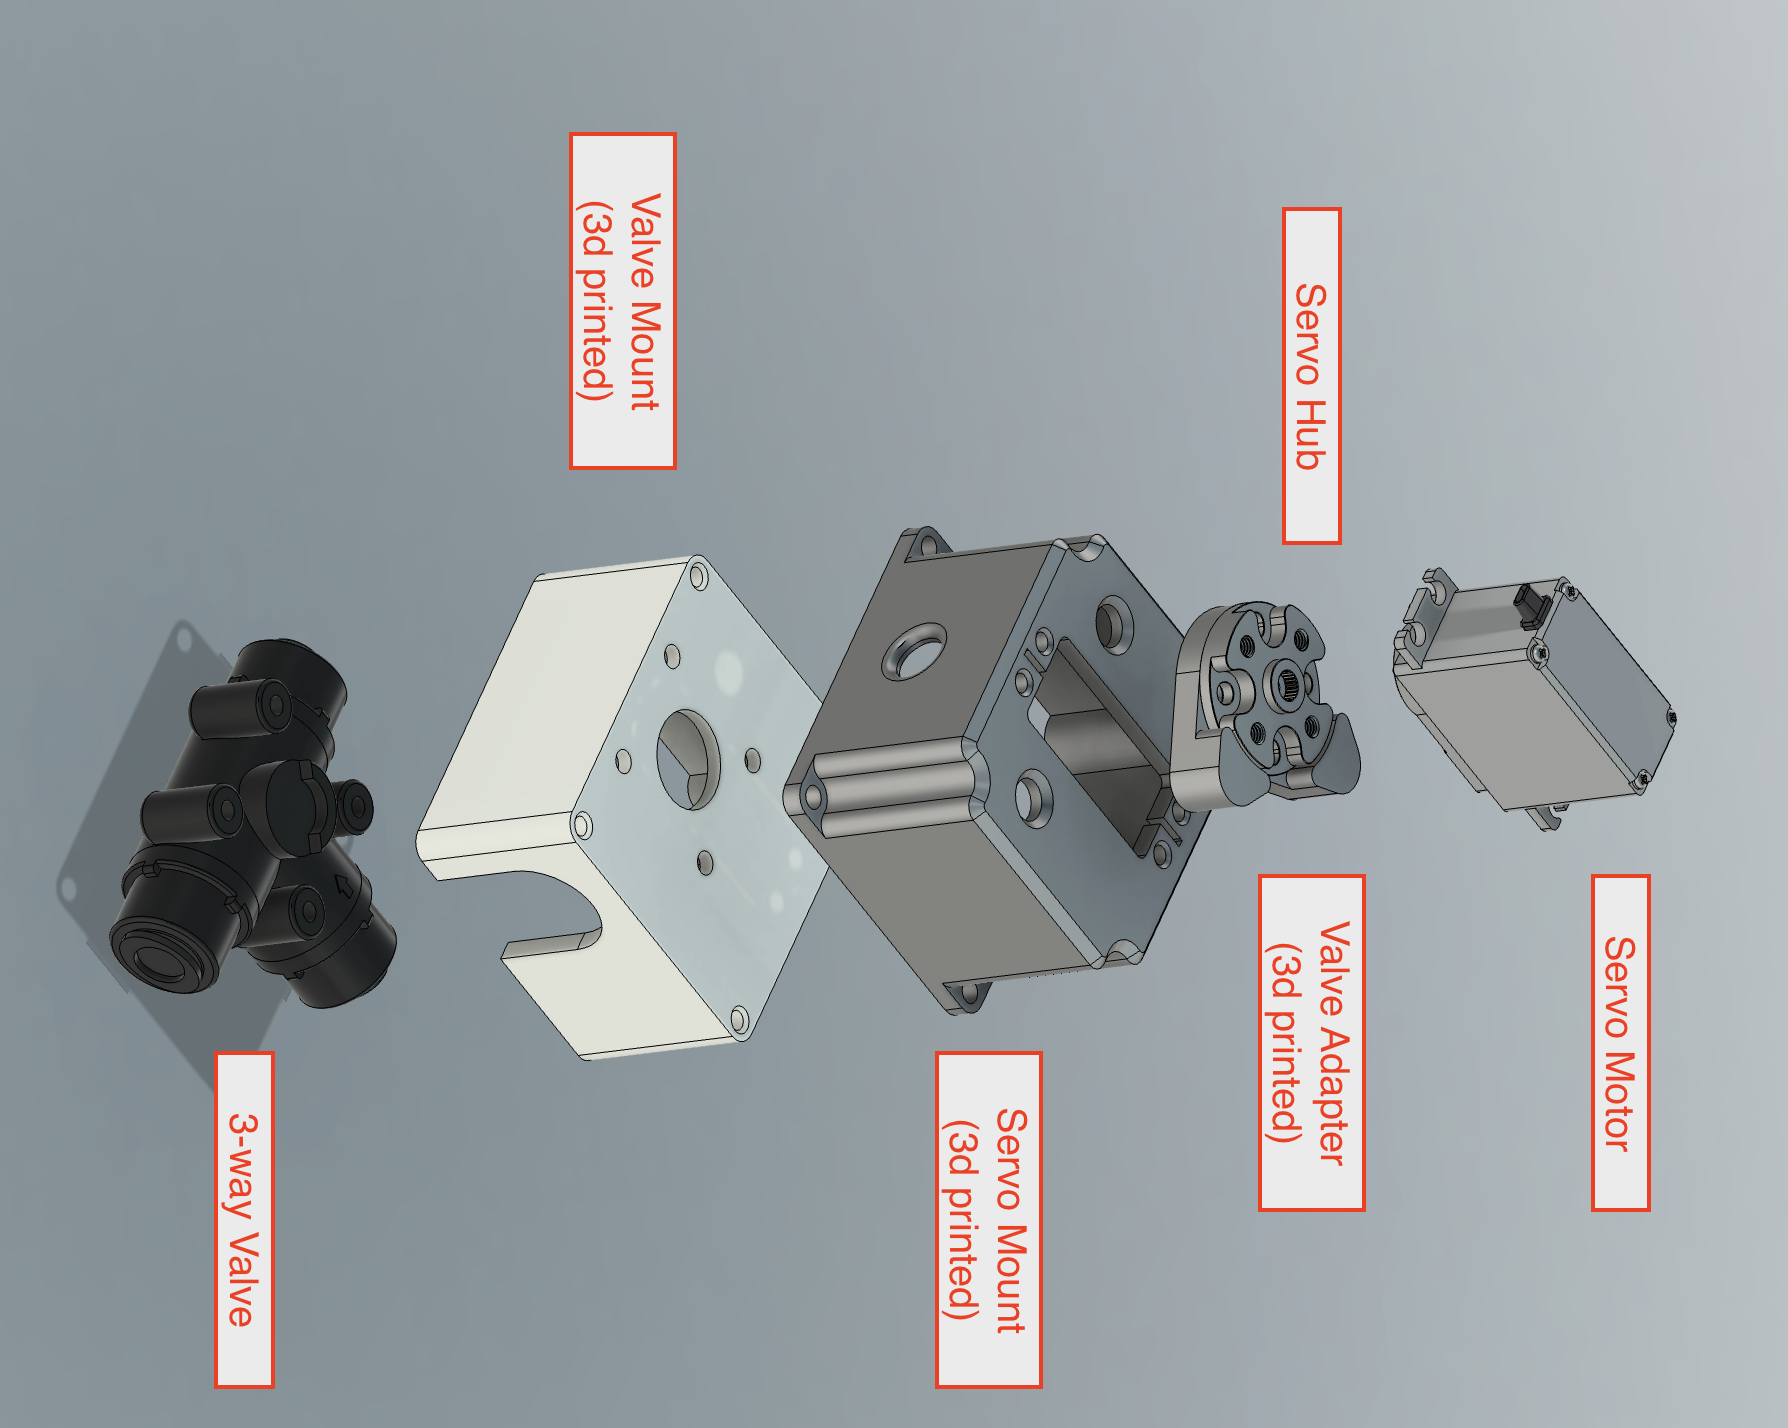
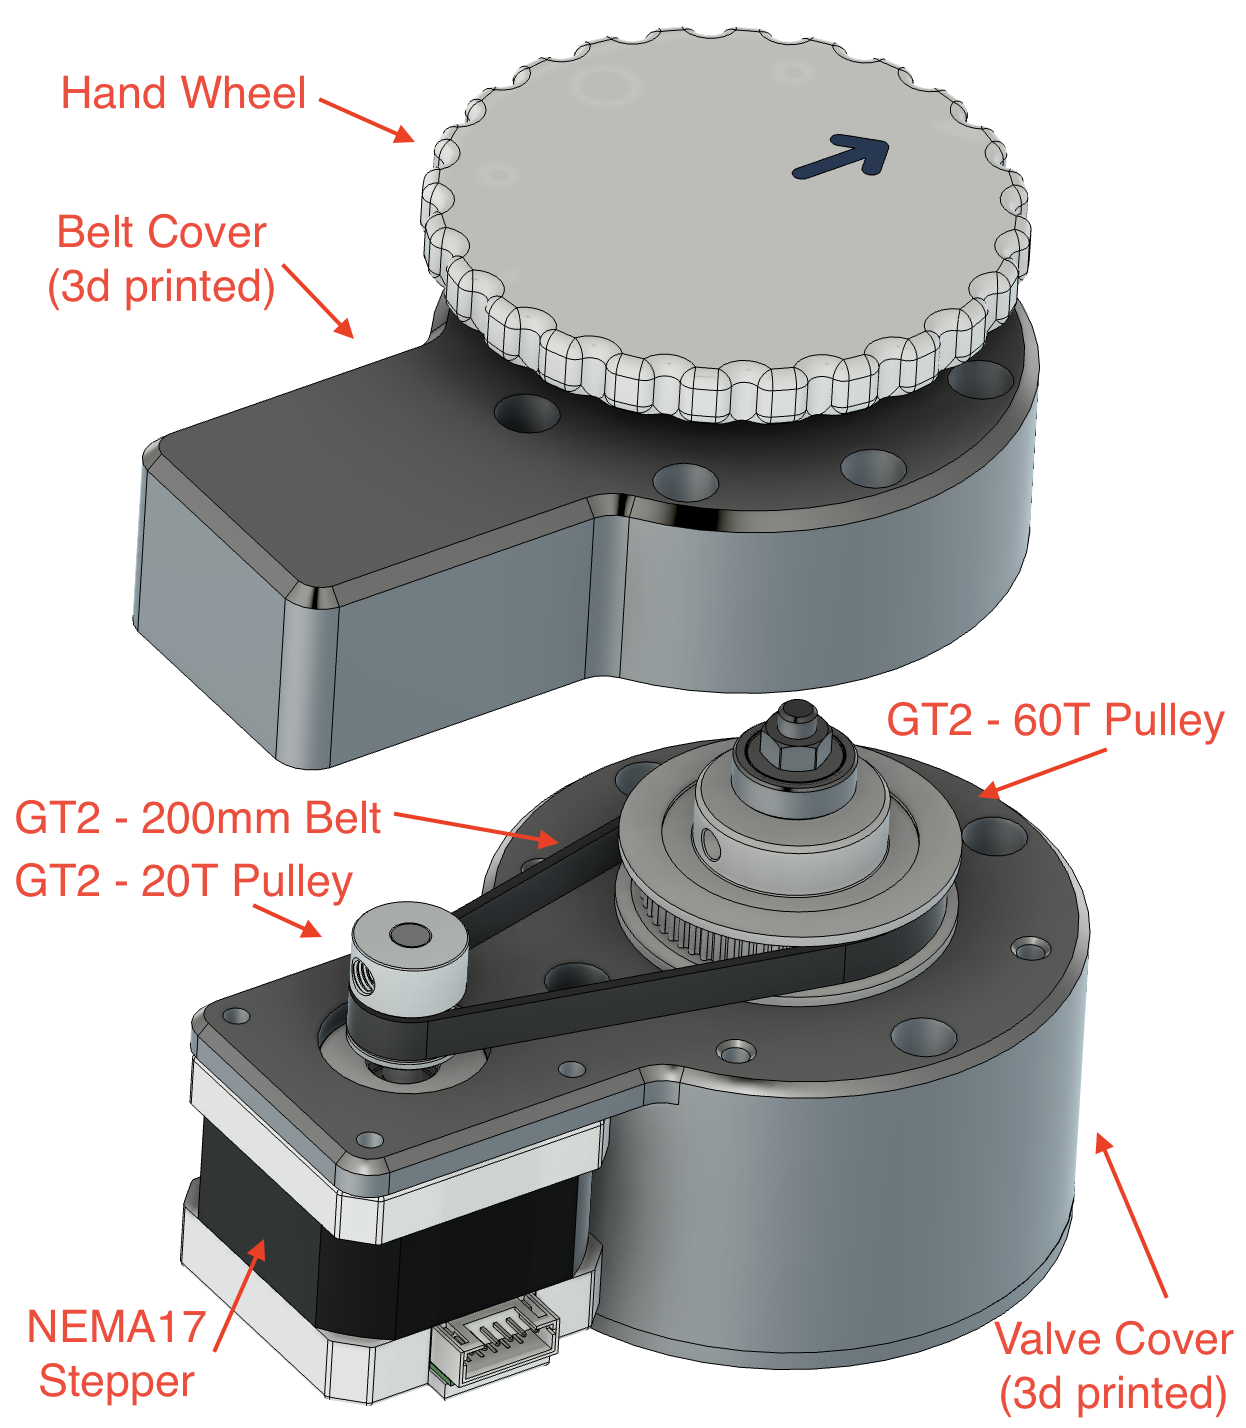
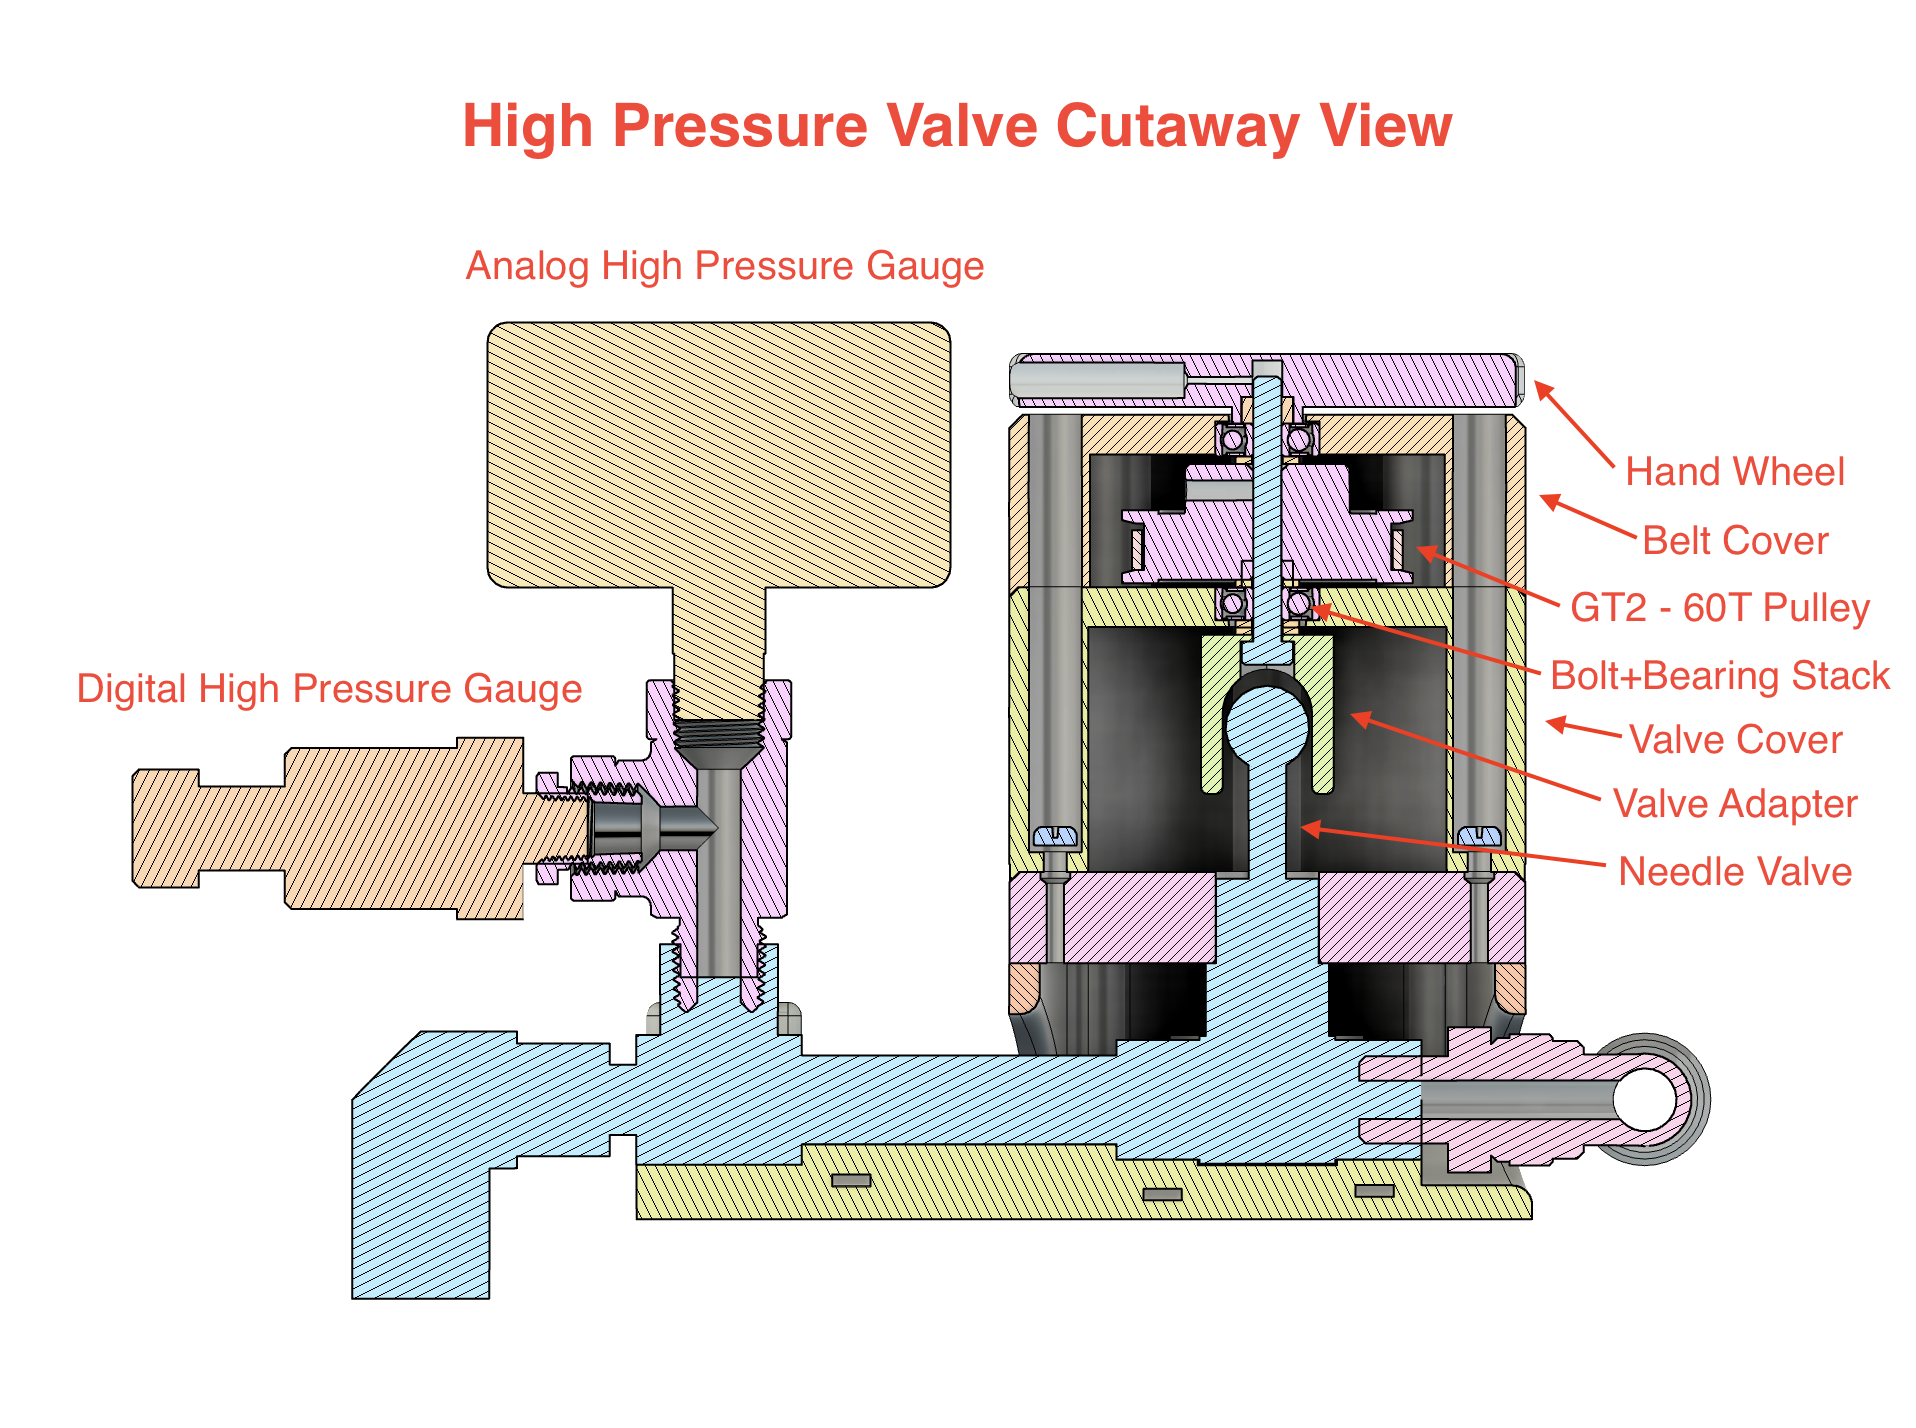
High Pressure Valve
The High Pressure Valve control is probably the most important and most difficult part of the watermaker to automate. After trying a few different things, I settled this design which does not require any modification of the high pressure valve. It is a complete assembly that fits over the regular valve.
Some key features of this design are a 3:1 gear ratio using the super common GT2 belts and pulleys, a NEMA17 stepper motor for precision, repeatability, and reliability. The hand wheel allows you to rotate the valve manually without removing any parts, although removing the assembly is also very easy. It also has ball bearings for a very long expected lifetime.
One of the important features of this design is the valve adapter. The needle valve on the Rainman can move multiple rotations and because it is threaded, it also moves in and out. The groove that mates with the valve handle needs to be tall enough to control it when it is all the way out and all the way in.
Also, the shaft of the assembly uses a simple hex bolt, so no custom parts are needed beyond the 3d printed components. The design is intended to be easy to DIY and easy to fix if needed.
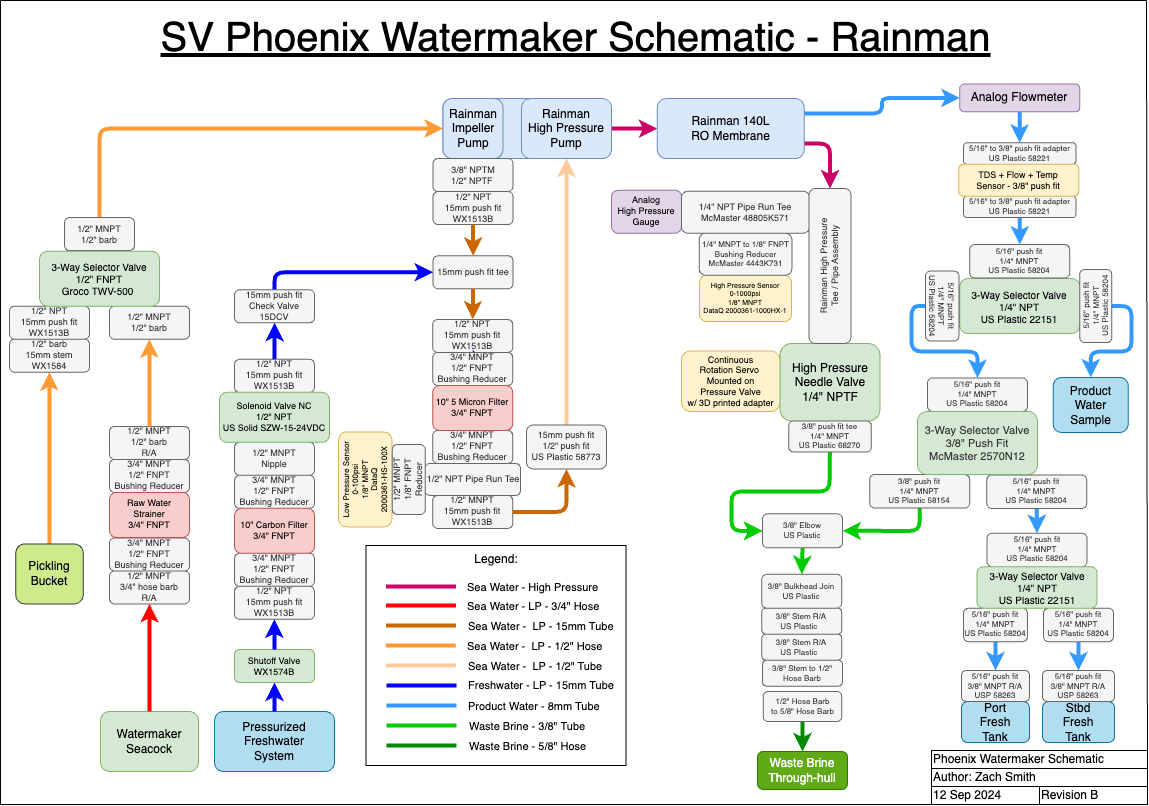
Plumbing Block Diagram
This is an older version of the block diagram used to design the system with part numbers. The 3D Printable Control panel below is more recent and contains a more accurate design with part numbers for each part.